


Do-It-Yourself EMF Meter Kit
EMF with Lights and Sound
Build your own EMF meter for less. GhostStop gives you the tools to build your own ghost hunting equipment. Custom-build your own EMF meter with just a few steps and unlimited possibilities.
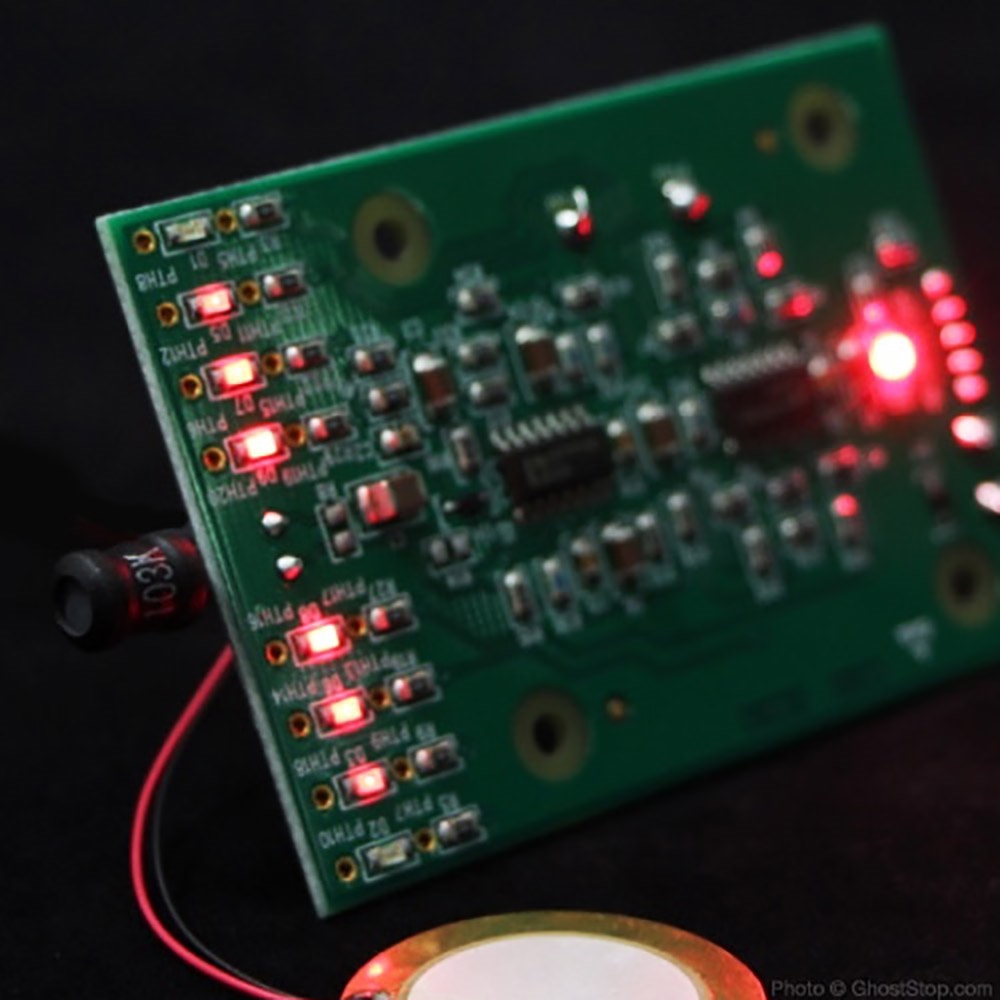
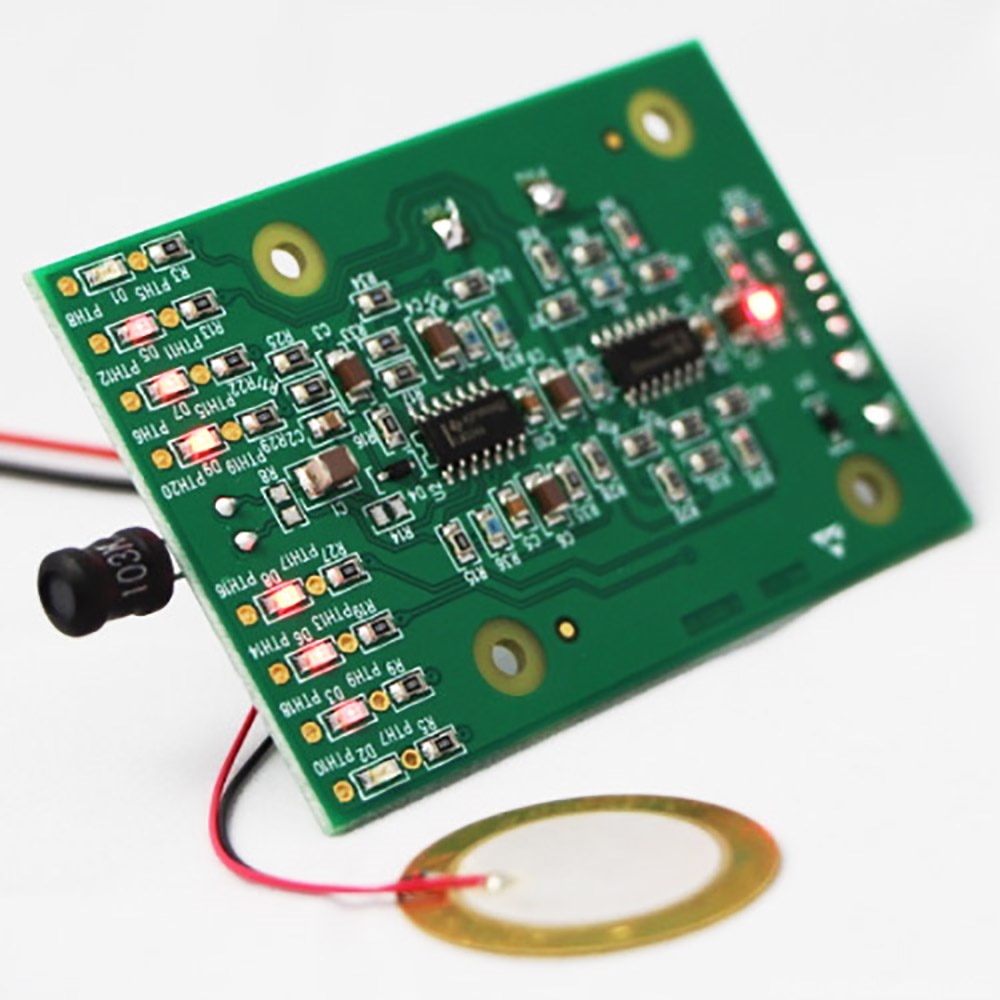
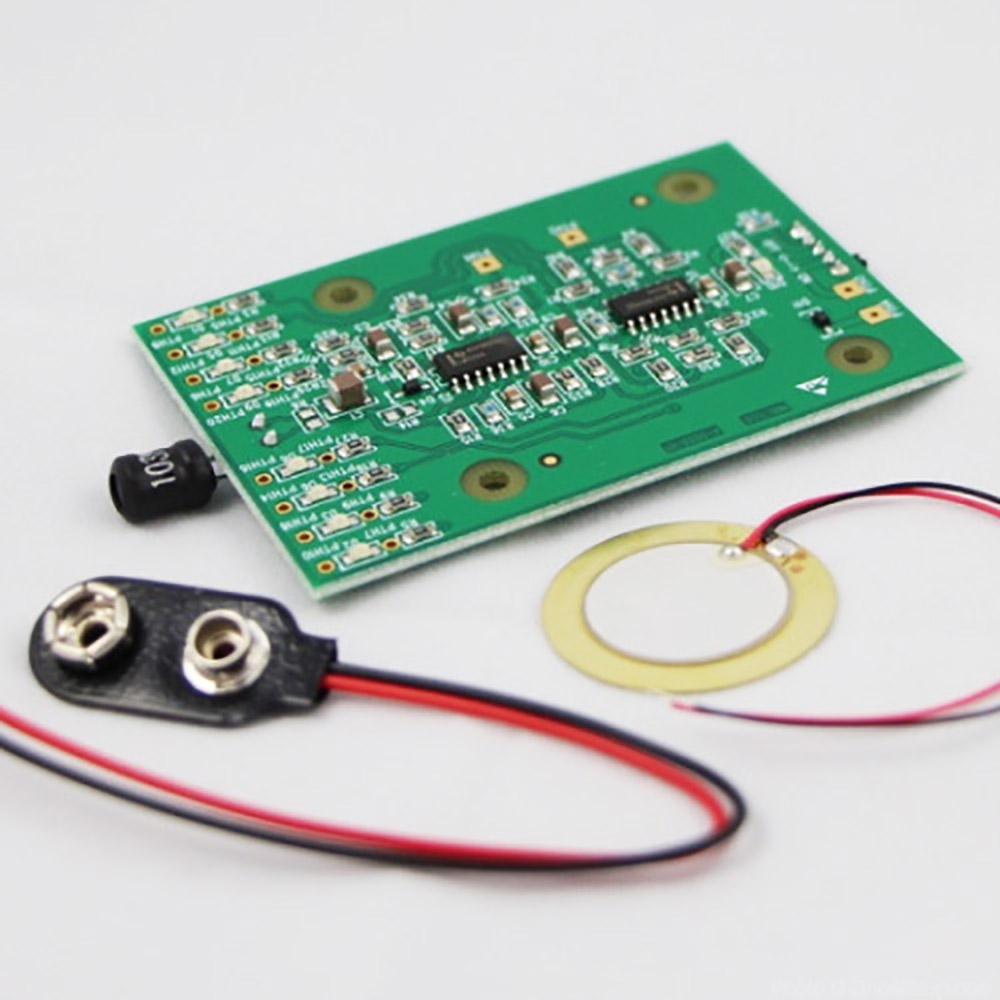
The GhostStop DIY EMF meter kit is a sophisticated and sensitive EMF meter with sensor, lights and sound that can be put together in just a few minutes. It also features solder points for additional lights and mounting points to install into any enclosure you wish. Put it inside your favorite trigger object, attach it to your body or mount it inside a rugged enclosure. The possibilities are endless and we want to see what you do with it!
Features
Looks intimidating - but it's easy to build.
The GhostStop DIY board comes pre-built with all the functions, programming and lights required for a sophisticated EMF meter. With just 2 solder points for power you can be up and running with basic EMF features and lights in less than a minute. With 2 more solder points to the speaker, you will have sound. A speaker and 9v battery hardness are included. It's simple and ready to go in less than a minute.
We'll even do the soldering for you so it works right out of the box, if you so choose. (select the soldering option when adding to cart above)
Customize it how you want.*
Want to take it further? Awesome. We want to see what you come up with! The pre-built board has many possibilities to make it simple or as custom as you like. The on-board light panel also includes solder points for adding your own LEDs. The included speaker operates on vibrating a surface to create sound. So, you can experiment with different materials, shapes and sizes to change the buzzer sound. You can also lead out the speaker, power and toggle as you see fit. IMPORTANT: See 'Technical Specs' for requirements needed for customizations.
Put it in anything.
Since we only supply the kit with functional parts you can install the completed unit into anything you want. Install it into your choice of trigger objects, project box or build your own awesome enclosure for it. Let your imagination run wild and try different things and see what results you get.
Lights & Sound
This unit includes 2 on-board panels of 4 LED lights to indicate the EMF strength. Together, with 8 LEDs, they will light up in pairs from inward to out for a unique visual of frequency strength. (see 'Technical Specs' for range details). For custom builds we have included through holds so that you can utilize just one panel of 4 or both. This also means you can have 2 separate displays, if you wish.
For sound, we have included a speaker that makes a 'buzzer' sound that changes intensity to represent signal strength. Because the speaker operates by vibrating surfaces you can mount it to just about anything for varying sounds.
Soldering Service (optional)
To make things easier we offer an optional service to solder the power and speaker onto the board for you. Just select the option above for an additional cost and we'll put the kit together for you. It will work right out of the box so you can put it right to work inside anything you wish.
 MADE IN THE USA from domestic and imported material.
This product is made right here at GhostStop.
* NO RETURNS on boards that have any indication of modifications. Contents include the functional board, power harness and speaker. This kit does not include any type of enclosure.
The GhostStop DIY EMF meter kit is a sophisticated and sensitive EMF meter with sensor, lights and sound that can be put together in just a few minutes. It also features solder points for additional lights and mounting points to install into any enclosure you wish. Put it inside your favorite trigger object, attach it to your body or mount it inside a rugged enclosure. The possibilities are endless and we want to see what you do with it!
Features
- EMF meter with lights and sound
- Quality EMF detection that is not nearly as susceptible to outside interference as other meters (walkies, cell phones, etc.)
- Dual light panel to indicate EMF strength (8 built-in lights and option to add your own LEDs)
- Buzzer sound gets louder indicating signal strength
- Simple, starter setup requires just 2 solder points for power (sound option just 2 more points)
- Build and expand on it as you like with unlimited possibilities
Looks intimidating - but it's easy to build.
The GhostStop DIY board comes pre-built with all the functions, programming and lights required for a sophisticated EMF meter. With just 2 solder points for power you can be up and running with basic EMF features and lights in less than a minute. With 2 more solder points to the speaker, you will have sound. A speaker and 9v battery hardness are included. It's simple and ready to go in less than a minute.
We'll even do the soldering for you so it works right out of the box, if you so choose. (select the soldering option when adding to cart above)
Customize it how you want.*
Want to take it further? Awesome. We want to see what you come up with! The pre-built board has many possibilities to make it simple or as custom as you like. The on-board light panel also includes solder points for adding your own LEDs. The included speaker operates on vibrating a surface to create sound. So, you can experiment with different materials, shapes and sizes to change the buzzer sound. You can also lead out the speaker, power and toggle as you see fit. IMPORTANT: See 'Technical Specs' for requirements needed for customizations.
Put it in anything.
Since we only supply the kit with functional parts you can install the completed unit into anything you want. Install it into your choice of trigger objects, project box or build your own awesome enclosure for it. Let your imagination run wild and try different things and see what results you get.
Lights & Sound
This unit includes 2 on-board panels of 4 LED lights to indicate the EMF strength. Together, with 8 LEDs, they will light up in pairs from inward to out for a unique visual of frequency strength. (see 'Technical Specs' for range details). For custom builds we have included through holds so that you can utilize just one panel of 4 or both. This also means you can have 2 separate displays, if you wish.
For sound, we have included a speaker that makes a 'buzzer' sound that changes intensity to represent signal strength. Because the speaker operates by vibrating surfaces you can mount it to just about anything for varying sounds.
Soldering Service (optional)
To make things easier we offer an optional service to solder the power and speaker onto the board for you. Just select the option above for an additional cost and we'll put the kit together for you. It will work right out of the box so you can put it right to work inside anything you wish.
This product is made right here at GhostStop.
* NO RETURNS on boards that have any indication of modifications. Contents include the functional board, power harness and speaker. This kit does not include any type of enclosure.
- Board designed and built right here at GhostStop
- EMF detection with 2 on-board panels of 4 LEDs to indicate EMF strength
- Piezo speaker gets louder to indicate EMF strength
- Powered by one 9-volt battery
- Board size: 71mm x 48mm x 3mm (board only not including toggle and sensor)
- Speaker size: 27mm diameter x less than 1mm
- EMF range: variable range from 0 to ~10mg+ (similar to that of comparable meters like a k2)
- Single axis emf detection
- See 'Direction & Contents' tab for Quick Start instructions
- -
- MODIFICATION SPECS:
- LED specs: most LEDs of any color around ~1.5v should work to varying degrees
- Speaker specs: Piezo 1.5v
- Power specs: 9-volt only. Do not use any other kind of power source.
CONTENTS
QUICK START
SAFETY Note: Before handling the board, it is recommended that you continue in a clean and static-free environment as static electricity can destroy the board. Grounding yourself with a static strap is recommended before proceeding.
1. For power, you need to solder the 9-volt battery harness to the board. Solder (or similarly connect) the wires of the battery harness (- and +) to the through holes indicated on the board as '-BAT+' respectively. Red is positive (+), black is negative (-).
2. Once connected, attach a 9v battery to the harness and slide the toggle switch into the ON position to make sure it powers on. You should, at least, see the LED in the middle of the board light to indicate power. Turn back OFF.
For optional sound:
3. For sound you will need to attach the speaker to the board. Solder (or similarly connect) the wires of the speaker (- and +) to the through holes indicated on the board as '+PIEZO-' respectively. Red is positive (+), black is negative (-).
4. Once connected, attach a 9v battery to the harness and slide the toggle switch into the ON position to make sure it powers on. You should, at least, see the LED in the middle of the board light to indicate power. Turn back OFF.
To test:
5. Turn the unit on by sliding the toggle switch into the ON position.
6. Take the completed unit to something that would give off an EMF signature (like a computer or fan). As the EMF grows stronger you will notice the LED panel of lights will light from inward out to indicate strength. With the speaker attached you will also hear an increase in the piezo buzzer. Since the speaker operates best while attached to a vibrating surface it may be hard to hear if you're just holding it. This is where you can test by affixing the speaker to different surfaces to make various sounds and loudness. Keep this in mind as you're testing it.
TIPS & IDEAS
- Pre-built EMF board with on-board lights and toggle
- 9-volt battery harness and lead wires
- Speaker and lead wires
QUICK START
SAFETY Note: Before handling the board, it is recommended that you continue in a clean and static-free environment as static electricity can destroy the board. Grounding yourself with a static strap is recommended before proceeding.
1. For power, you need to solder the 9-volt battery harness to the board. Solder (or similarly connect) the wires of the battery harness (- and +) to the through holes indicated on the board as '-BAT+' respectively. Red is positive (+), black is negative (-).
2. Once connected, attach a 9v battery to the harness and slide the toggle switch into the ON position to make sure it powers on. You should, at least, see the LED in the middle of the board light to indicate power. Turn back OFF.
For optional sound:
3. For sound you will need to attach the speaker to the board. Solder (or similarly connect) the wires of the speaker (- and +) to the through holes indicated on the board as '+PIEZO-' respectively. Red is positive (+), black is negative (-).
4. Once connected, attach a 9v battery to the harness and slide the toggle switch into the ON position to make sure it powers on. You should, at least, see the LED in the middle of the board light to indicate power. Turn back OFF.
To test:
5. Turn the unit on by sliding the toggle switch into the ON position.
6. Take the completed unit to something that would give off an EMF signature (like a computer or fan). As the EMF grows stronger you will notice the LED panel of lights will light from inward out to indicate strength. With the speaker attached you will also hear an increase in the piezo buzzer. Since the speaker operates best while attached to a vibrating surface it may be hard to hear if you're just holding it. This is where you can test by affixing the speaker to different surfaces to make various sounds and loudness. Keep this in mind as you're testing it.
TIPS & IDEAS
- The piezo speaker operates by vibrating a surface. Metal surfaces seem to work best, but try many different options like hard plastics or glass. The shape of the object will also change the pitch and loudness.
- Since there are two panels of 4 LED lights you can use just one set of 4 or both. Maybe you could make two readouts that can be seen on each side of the device. Try it.
- If you decide to use your own LED lights by using the through-holes, you may need to remove the on-board LED to achieve enough power. To do so, just use a soldering iron to remove the on-board LED or use wire snips to destroy the LED itself by cutting the connection. This will provide more power to your LEDs.
- Though the EMF sensor itself is single axis you can point it in any direction you wish. Maybe try a different plane.
- Want to add a power switch? Add it between the battery harness and the board and just keep the on-board switch in the on position. That's easier than swapping the on-board switch.
- Let us know your own tips!
3 Reviews
-
DIY EMF Meter Kit
The EMF Meter works great but it has more soldering than advertised. you have to solder the power switch and the EMF sensor as well as the battery clip and piezo speaker.
-
good results
I put this together using a small waterproof box and attached toggles for power and speaker. It works well and the lights are bright.
-
DIY EMF Meter Kit
This kit is made on a quality printed circuit board with the surface mount parts are soldered very nicely. LEDS are nice and bright. The detector is sensitive to EMF and RF. It's fairly easy put this together and operating as a finished product. I am a CET myself and have worked with electronics since the tube age.


